

Decoupage a Picture Frame: Easy DIY Craft Guide
A plain picture frame often becomes the last-minute gift that feels a little unfinished. You have the photo, the occasion, and the good intention, but the frame itself doesn’t yet carry any personality.
That’s why I love to decoupage a picture frame. It turns a basic object into something with memory, texture, and mood. Done well, it looks less like a weekend craft and more like a small boutique piece someone keeps on a bookshelf for years.
From Simple Frame to Cherished Keepsake
A handmade frame works when you want a gift to feel thoughtful without becoming fussy. A hostess gift with a family snapshot, a wedding table number that doesn’t look rented, a nursery frame waiting for a first photo. Decoupage handles all of those beautifully because it lets the surface tell a story.
The craft also has real pedigree. Decoupage originated in 12th-century China and later flourished in 17th-century Europe, where aristocrats used intricate cutouts on objects like frames. The traditional method used 30 to 40 layers of varnish, sanded to a polished finish that mimicked painting (history of decoupage). That lineage matters because it reminds you this isn’t just glue and paper. It’s decorative art with centuries of refinement behind it.
What makes it so appealing now is the mix of grace and flexibility. You can use floral paper, old maps, handwritten notes, linen scraps, tissue napkins, or favorite photographs. You can keep it crisp and neat or make it playful and layered.
A decoupaged frame succeeds when it feels chosen, not crowded.
For entertaining, I like frames that echo the rest of the room. A botanical pattern can sit near candles and flowers. A striped or toile motif can anchor a bar cart. If you lean whimsical, this kind of project pairs naturally with the spirit of whimsical home decor ideas, especially when you want something cheerful without losing polish.
Why frames are such a satisfying canvas
Frames have boundaries. That sounds obvious, but it helps. The edges give your pattern a place to stop, and the finished proportions make even small scraps feel intentional.
They’re also useful. Unlike many crafts that end up tucked in a drawer, a frame gets displayed, gifted, handled, and noticed.
Gathering Your Creative Palette
A good frame starts to look special before the glue jar is even open. The materials you choose set the mood, the texture, and how polished the finished piece feels in your hands.
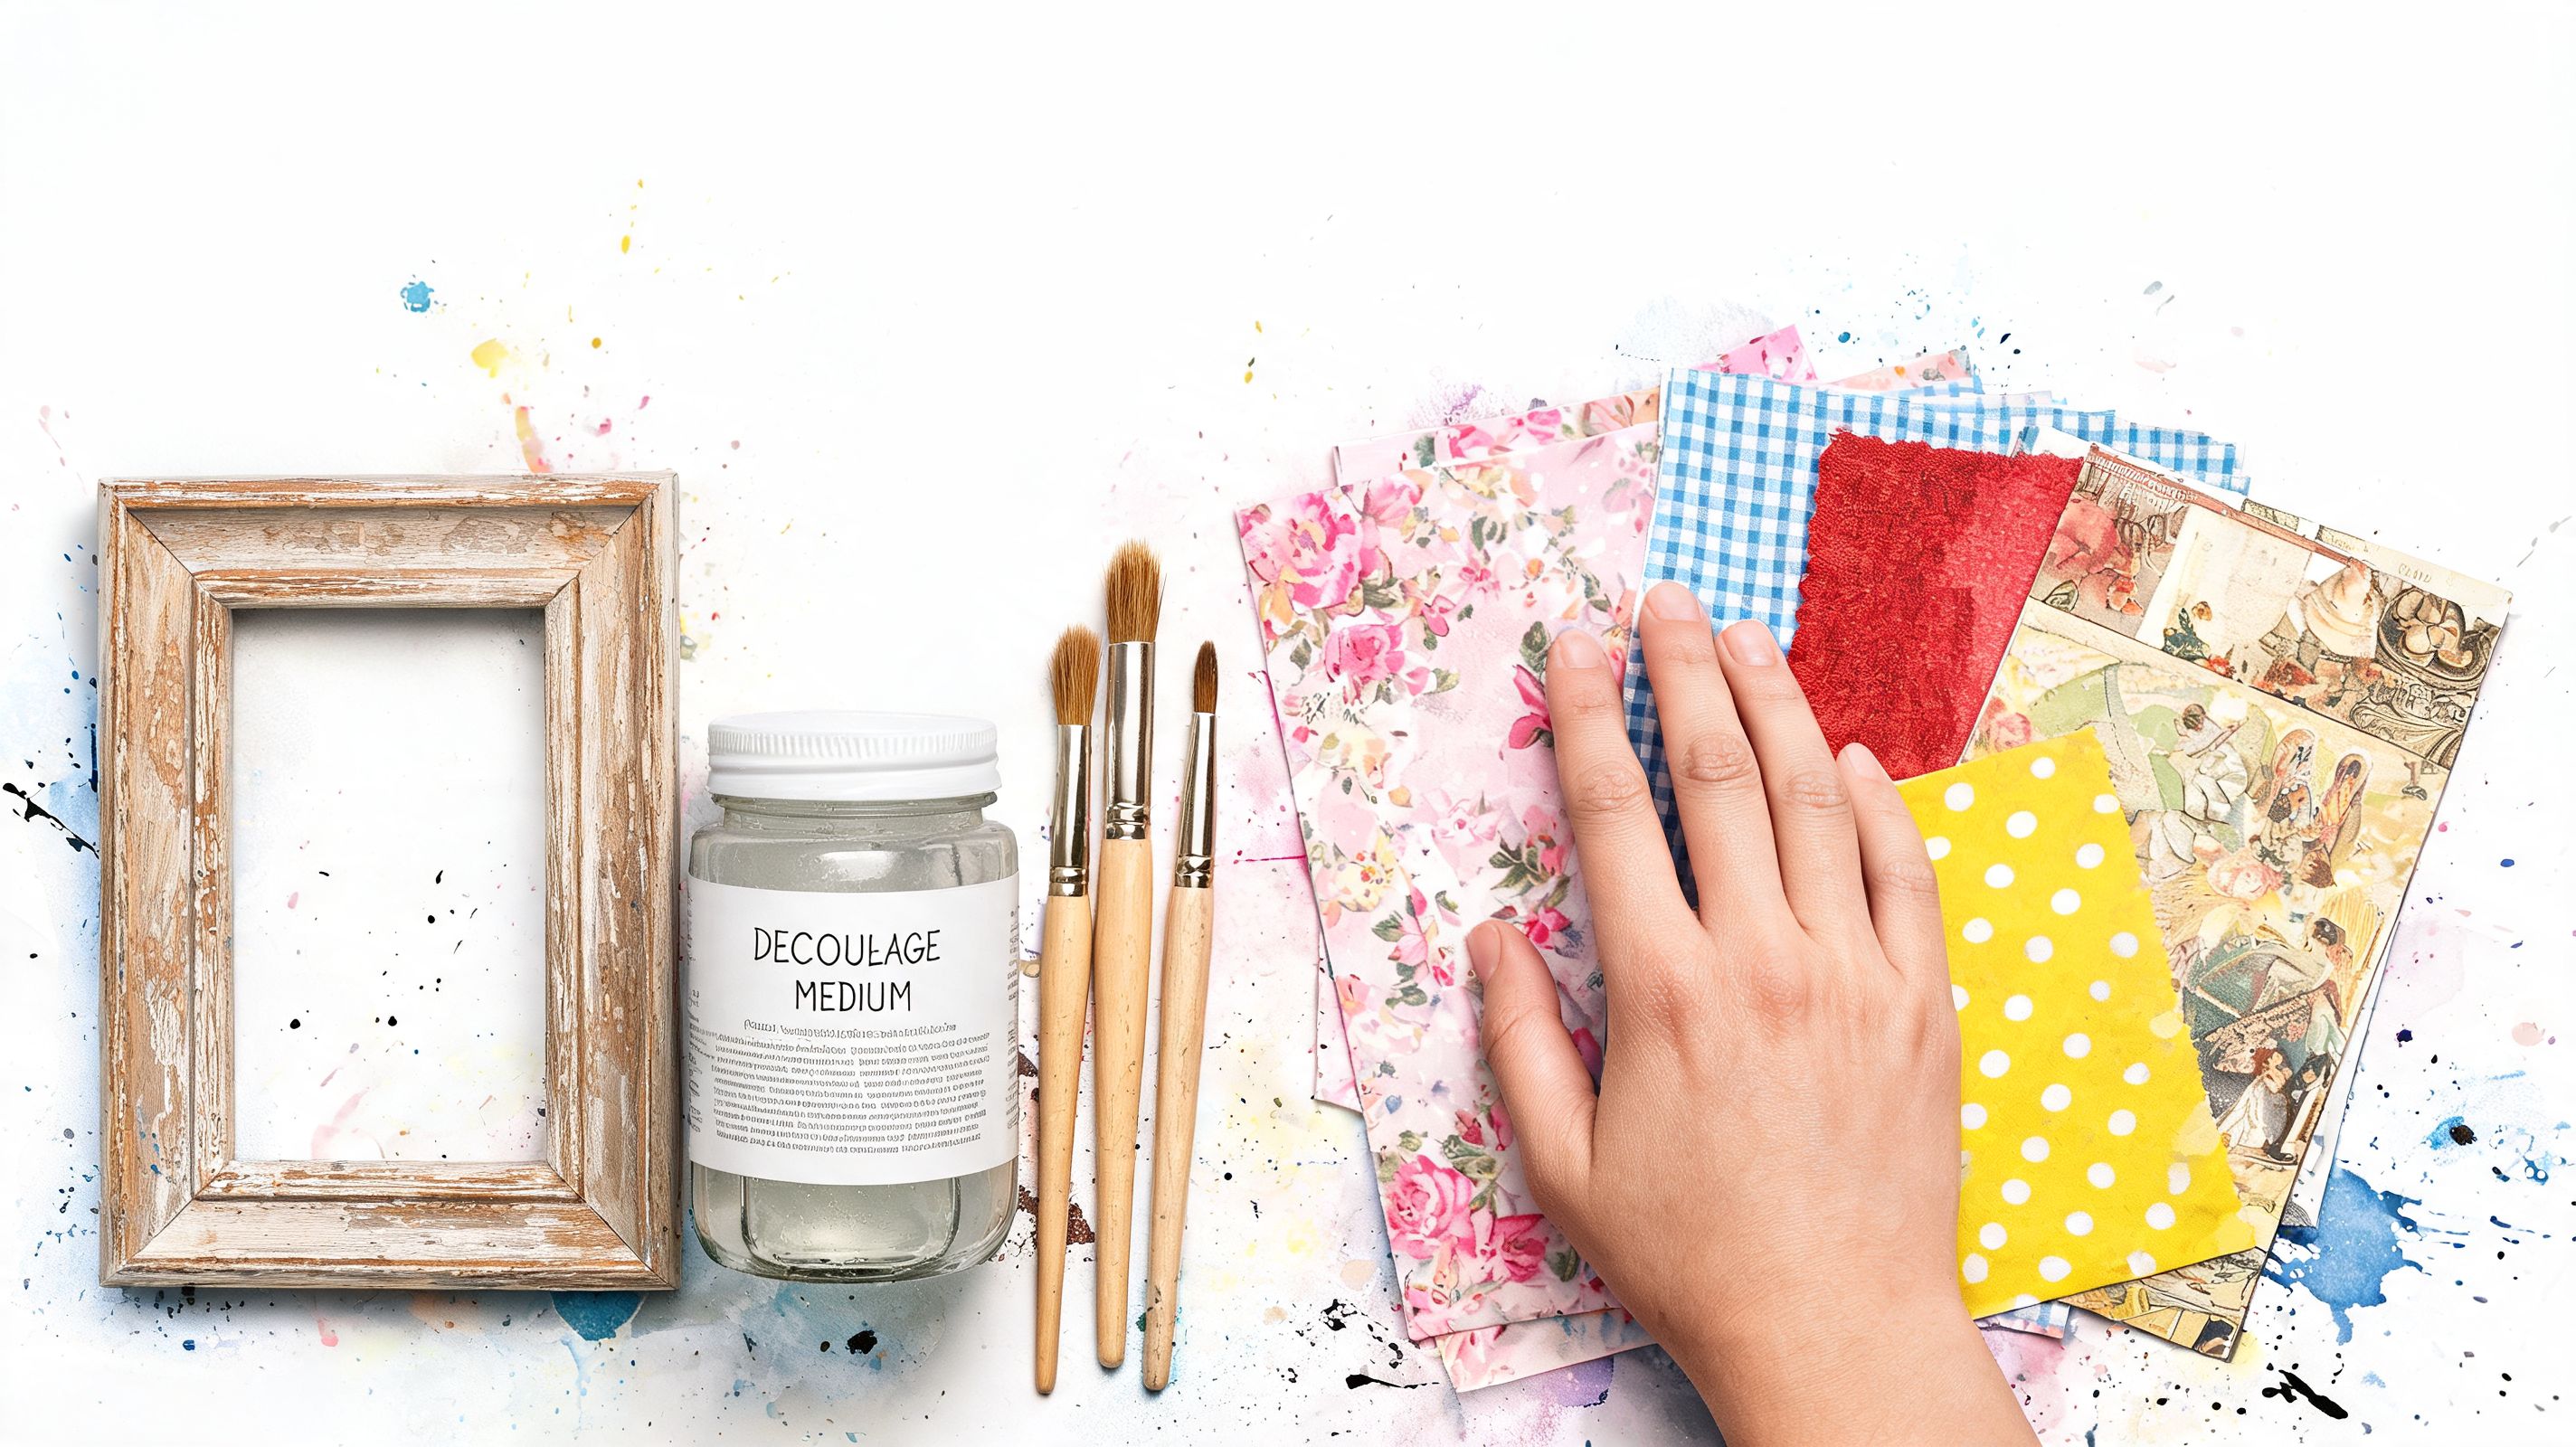
Start with a clear plan. Pick the frame first, then one star material, then the supporting pieces. That restraint is what keeps a handmade project looking collected instead of busy.
What to pull before you start
Set out the supplies that give you control, not just decoration:
- A frame with a flat profile. Flat edges are easier to cover neatly, especially if you want crisp corners and a clean wrapped finish.
- Decoupage medium. A dependable all-purpose formula such as Mod Podge gives you enough slip to position paper or fabric, then dries clear.
- A foam brush and a small flat brush. Use the foam brush for broad, thin coats and the flat brush to press adhesive into corners and grooves.
- Fine-grit sandpaper or an emery board. Handy for smoothing the frame before you begin and tidying dry edges later.
- Sharp scissors or a craft knife. Narrow frame rails show every uneven cut.
- A smoothing tool. A credit card works in a pinch. A brayer gives better pressure for photos, fabric, and larger motifs.
- Optional fabric prep supplies. Lightweight fusible web, pinking shears, or fray check can save a lot of frustration if you choose fabric.
Paper is classic. Fabric gives you a richer finish.
Paper, tissue, and napkins are still lovely choices, and they are often the fastest route to a delicate pattern. Fabric brings a different kind of beauty. It adds soft texture, hides minor surface imperfections better, and tends to hold up well on frames that will be wrapped, gifted, and handled often.
I’ve noticed a growing interest in fabric decoupage, but there’s still a gap in tutorials that explain the fabric-specific details that make the finish look polished. Fabric can fray at the cut edge. Thick weaves can fight you at the corners. Dark prints may need a lighter base underneath. Once you know those trade-offs, fabric becomes one of the most rewarding options for a boutique-style result.
Use fabric when you want:
- A tactile finish that feels closer to textile art than printed paper
- A durable surface for hostess gifts, nursery frames, or wedding keepsakes
- A more custom look that echoes table linens, ribbon, or gift wrap
- A handcrafted piece with Jolitee’s gift-forward charm, especially when the frame is part of a thoughtful set
Material rule: If the room already has texture from linen, wicker, velvet, or wood grain, a fabric-covered frame often looks more refined than a glossy paper finish.
Choosing patterns and colors that suit the frame
Small and medium-scale prints are usually the easiest to place. Tiny florals, narrow stripes, scattered botanicals, and petite geometrics bend around frame edges with less visual interruption. Large medallions and oversized florals can work, but only if the frame is wide enough to show off the repeat.
Color deserves a minute of planning too. A frame is a border, so it should support the photo or artwork rather than compete with it. If you want help selecting the perfect frame colors, that guide is a useful starting point.
For gift projects, I like to pull cues from the setting where the frame might live. A floral fabric can echo a tablescape. A stripe can sharpen up a guest room vignette. If you’re building a hostess gift or event bundle, patterned materials can pair beautifully with decorative cocktail napkins for entertaining, giving the whole gift a thoughtful, coordinated feel.
The Art of Flawless Preparation
Most disappointing decoupage projects fail before the decorative layer even goes on. The frame wasn’t cleaned, the finish was too slick, or the base color was skipped. Then the top layer wrinkles, dulls, or lifts at the edges.
Preparation is what separates charming from homemade-looking.
Start by giving the surface some grip
If the frame is unfinished wood, sand it lightly until it feels smooth but not polished. You’re not reshaping it. You’re removing splinters and evening out any rough grain that could show through paper or fabric.
If the frame is painted, varnished, metal, or plastic, clean it thoroughly and scuff the surface with fine-grit sandpaper. Adhesive needs a surface it can hold onto. A glossy factory finish is usually too slick on its own.
Here’s the trade-off. Ornate thrifted frames can look wonderful once finished, but the curves and carved details make application harder. A flat-front frame is less dramatic, yet it gives you a cleaner result if you’re still learning.
Prime before you decorate
A base coat matters more than people expect. White, ivory, or a soft tone close to your fabric background helps your pattern stay bright instead of muddy.
That underlayer also improves consistency. On raw wood, dark grain can peek through pale florals or lightweight paper and make the whole frame look uneven. On an older painted frame, priming hides color variation and old wear marks.
A practical prep sequence looks like this:
- Clean first so dust and oils don’t get trapped under glue
- Lightly sand to smooth roughness and create grip
- Fill chips if needed on vintage or damaged frames
- Apply a base coat in white or a tone that flatters your print
- Let it dry fully before any decoupage medium touches the frame
Skip prep and the project will still look handmade. Prep carefully and it starts to look collected.
Fabric needs one extra layer of discipline
Fabric is lovely, but it can misbehave. Thin cotton can fray. Looser weaves can absorb too much medium. Heavier fabric can resist sharp corners.
That’s why I prefer tightly woven cottons, lightweight linen blends, or very fine quilting cotton for frames. Pre-cut pieces before you glue anything down. For corners and narrow inner edges, smaller sections are easier to manage than one heroic wraparound piece.
If you’re using a sentimental textile, test a scrap first. Some printed fabrics darken slightly once adhesive touches them, and some bleed more than you’d expect.
Bringing Your Vision to Life Step by Step
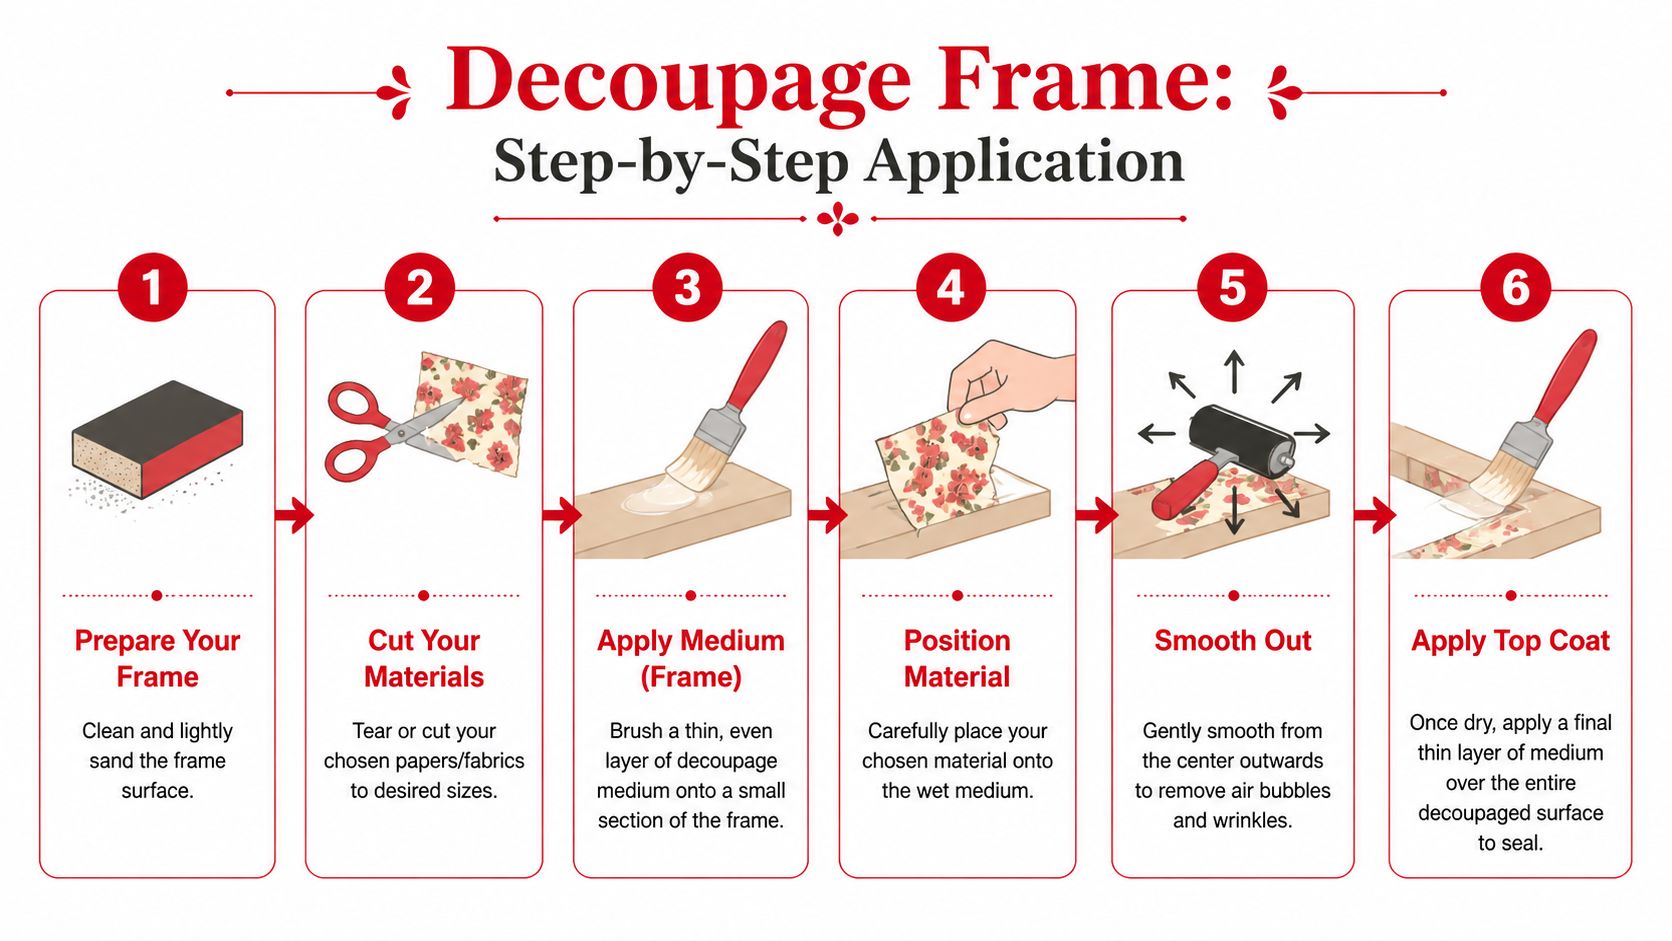
The heart of the project is simple. Apply a thin layer of medium, place the material, smooth it carefully, and seal it with patience. The details make the difference.
A visual walkthrough helps before your first pass.
Work in small sections, not all at once
Frames are narrow, which tempts people to coat the whole thing and rush. Don’t. Brush medium onto one section at a time so you can place and smooth without panic.
The application should be thin and even. Experts report that bubble-free finishes exceed 95% when you apply a thin 1/16-inch layer of Mod Podge and immediately smooth the motif with a credit card held at a 45-degree angle, which expels 90% of air bubbles right away. They also note that 70% of wrinkling failures come from applying the glue too thickly (bubble-free decoupage technique).
That one point saves a lot of frustration. Most wrinkles aren’t caused by bad paper. They’re caused by too much medium.
How I approach different materials
Paper napkins need a gentle hand. Separate the printed top layer from the backing layers before cutting or tearing. Because napkins are delicate, lay them down slowly and smooth with almost no pressure at first.
Scrapbook paper is sturdier and easier to reposition in the first seconds. It’s a good beginner material if you want crisp edges.
Fabric sits somewhere in the middle. It’s stronger than napkin, but because it has body, it can bunch on inside corners. Cut pieces to fit each rail of the frame rather than forcing one large piece across every angle.
A good rhythm looks like this:
- Brush on a thin coat over one rail or corner
- Lay down the material without stretching it
- Smooth from the center outward with a credit card or fingertip wrapped in plastic
- Check the corners quickly before the medium grabs
- Wipe away seepage at the edges with a barely damp cloth
If the material starts sliding around, there’s probably too much medium underneath.
For inner and outer frame edges, I like to let a slight overhang dry first and then sand it away gently. That gives a cleaner finish than trimming wet material with scissors.
A video can make the hand motions clearer than words alone.
Sealing is where the frame starts to look finished
Once the decorative layer dries, the top coats create cohesion. They soften paper edges, protect the surface, and give the frame that unified sheen people associate with a polished piece.
Apply thin top coats and let each one dry properly. A rushed seal coat often drags the design, especially over napkins. On fabric, thin coats help prevent a stiff, plasticky surface.
Here’s a quick comparison of what usually works best:
| Material | Best look | Main caution | Best approach |
|---|---|---|---|
| Napkins | Soft, airy, painterly | Tearing and wrinkles | Minimal handling and very thin coats |
| Scrapbook paper | Crisp and graphic | Visible seams | Match patterns carefully and sand edges cleanly |
| Fabric | Textured and boutique-like | Fray and corner bulk | Use smaller pieces and smooth patiently |
Finishing touches that elevate the result
A frame doesn’t need embellishment, but sometimes a little extra detail helps. A narrow painted edge inside the opening can sharpen the design. A distressed pass with fine sandpaper can soften bright prints. A satin or gloss final sealer changes the mood entirely.
Choose the finish to match the purpose. Gloss feels dressier. Satin is easier to live with. Matte can look beautiful on vintage-inspired floral or map designs.
Designs for Gifting and Entertaining
A good decoupaged frame earns its place because it suits the moment. For a host, it can feel warm and useful. For a wedding or baby gift, it becomes a keepsake people display instead of tucking into a drawer.

Hostess gifts that feel personal
Some of the best hostess frames start with a place. I like map paper, but map-print fabric has more presence and holds up beautifully on a frame that may get moved from shelf to shelf. A honeymoon city, a family lake town, or the neighborhood where the host bought their first home all give the piece a story without making it overly sentimental.
For dinner parties, stay in step with the room. Blue and white prints, block florals, fine stripes, and muted botanicals sit easily in kitchens, bars, and breakfast nooks. If the home already has layered textiles, fabric decoupage usually looks richer than paper and gives the frame that small-boutique, handcrafted feel Jolitee gifts do so well.
Wedding and celebration ideas
Frames also work hard at events. They can hold a menu, mark a signature cocktail, display a table number, or frame a short welcome note. Fabric is especially useful here because it can pick up on table linens, bridesmaid colors, or invitation details in a way paper often cannot.
A few combinations that consistently look polished:
- Soft floral cotton with script paper details for bridal showers
- Natural linen or linen-look fabric for wedding table numbers
- Gingham, ticking stripe, or tiny checks for birthday brunches and garden lunches
- Nursery prints or brushed cotton florals for baby showers and first-year gifts
Scale matters. Large prints can overpower a narrow frame rail, while smaller motifs wrap corners more neatly and look cleaner in a finished gift.
Photo collage frames that still look polished
Photo-based designs need restraint. The prettiest versions usually keep one clear focal photo, then use fabric or paper around it rather than crowding the whole frame with images.
Trim photo pieces a touch smaller than the area they need to fill. That slight margin keeps edges from looking cramped and gives the layout a more intentional finish. If you want a layered look, pair matte photos with a quiet cotton print or a soft linen texture instead of another busy pattern. The contrast reads refined, not scrapbook-heavy.
These are especially nice for:
- Anniversary gifts
- Grandparent presents
- Graduation keepsakes
- Vacation memory displays
- Wedding welcome table styling
The strongest designs usually center on one idea. A place, a person, a season, or a celebration.
If you want more gift ideas with that same personal, decorative feel, this guide to personalized home decor gifts is a lovely place to start.
Troubleshooting and Long-Term Care
A few flaws are part of decoupage, especially on frames where corners, inner edges, and narrow rails all fight for attention. The good news is that nearly every common issue can be fixed cleanly if you catch it early and use a light hand.
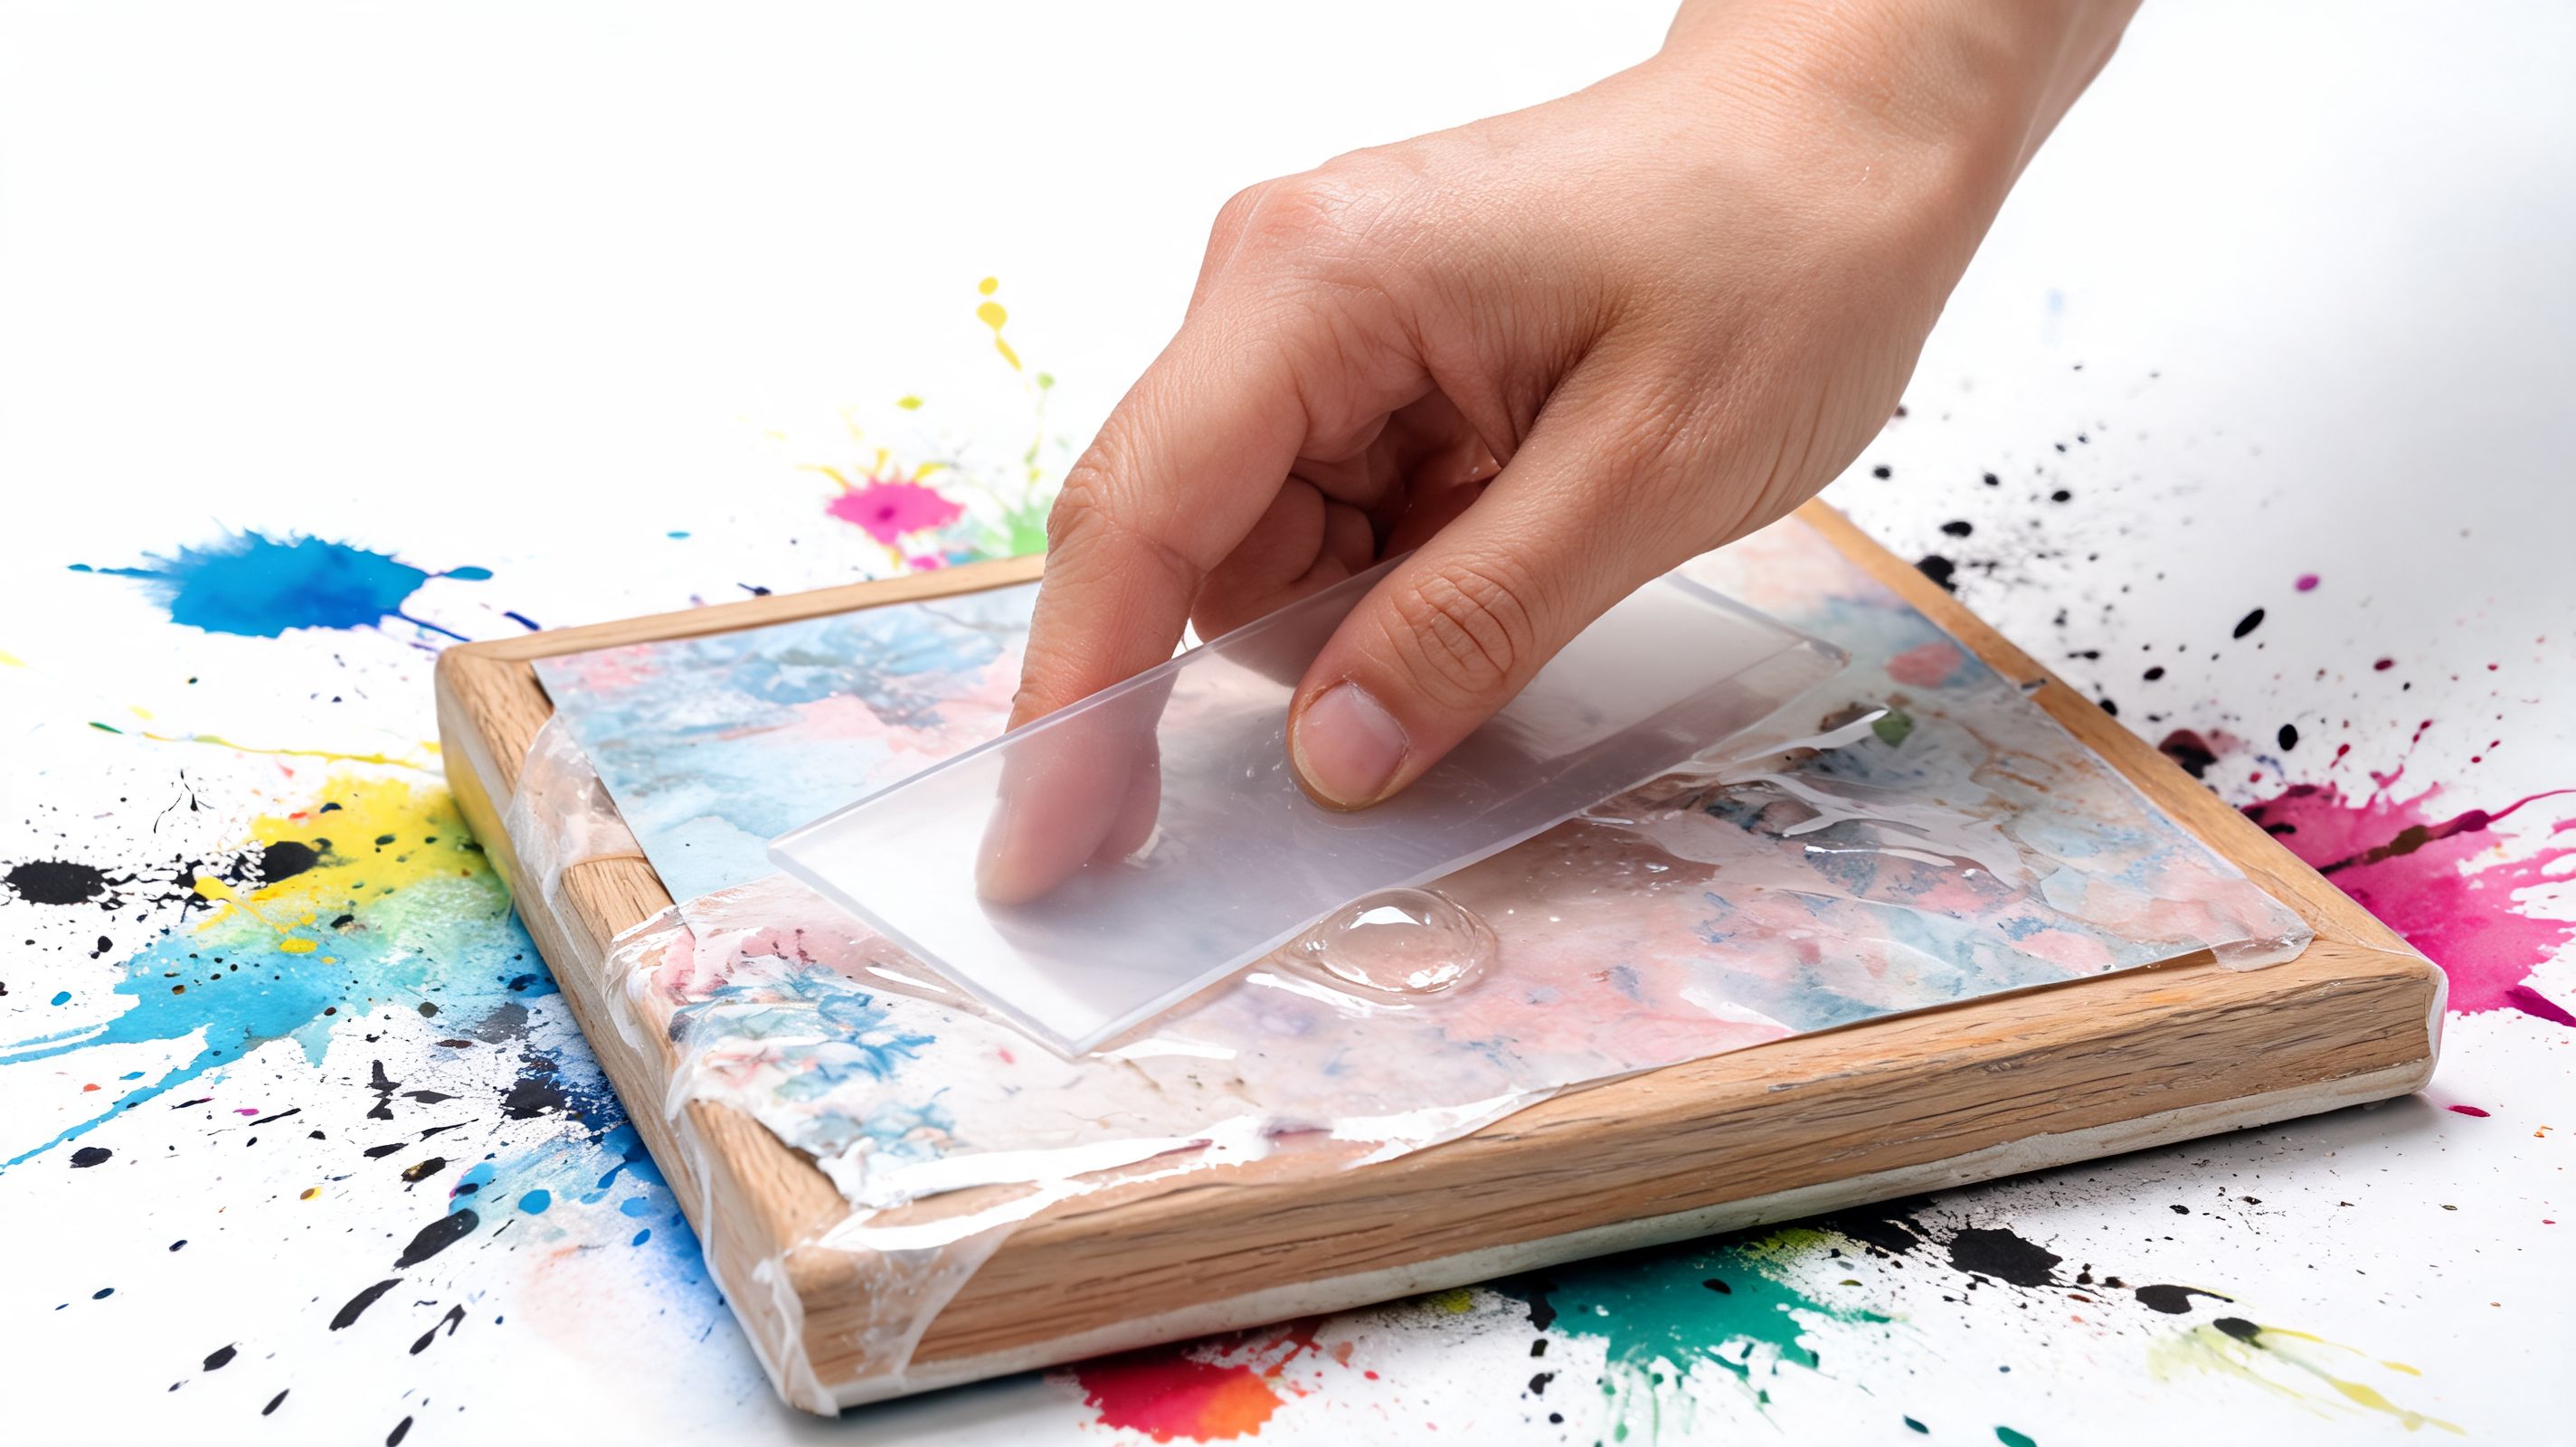
When the surface wrinkles or bubbles
Wet wrinkles are the easiest to correct. Lift the paper or fabric gently, add only the smallest touch of medium if the area looks dry, then smooth from the center outward with your fingers or a flexible scraper.
Dry bubbles need a more careful repair. Prick the raised spot with a fine pin, work a little medium underneath with a detail brush, then press it flat under wax paper so the surface stays clean.
Fabric gives you more forgiveness than napkins or very thin paper. That is one reason I like using cotton lawn, lightweight linen, or other fine fabrics for gift frames. They settle around edges more neatly, hide tiny repairs better, and hold up well over time, which helps the finished piece feel more boutique than temporary.
When the finish feels tacky
A tacky finish usually comes from coats that went on too thick, cure time that was cut short, or humid air slowing everything down. Stop adding layers once you notice drag. Let the frame dry fully, then test it again the next day before doing anything else.
If it still feels sticky, a clear acrylic spray sealer often helps by adding a harder top finish. Use several light coats instead of one heavy pass. That keeps the surface clearer and reduces the risk of cloudiness, especially over patterned fabric where you want the texture to stay visible.
How to keep the frame looking fresh
Long-term care is simple, but it matters.
- Dust with a soft dry cloth so moisture does not soften the finish
- Keep the frame out of strong direct sun if you used delicate prints or dyed fabric
- Skip household cleaners that can dull or soften the topcoat
- Pick it up by the outer edges instead of pressing on the decorated face
- Avoid damp rooms for fabric-covered frames, since textile fibers can hold moisture longer than paper
Frames made for gifting deserve a finish that lasts through real use, not just the handoff. If you want a quick reference for supplies, drying expectations, and other practical prep details, these common questions about our craft kits are helpful.
A well-sealed frame is sturdy, but handmade pieces always look best with sensible handling. That little bit of care keeps the colors crisp, the corners neat, and the whole piece feeling special enough for a Jolitee-style gift table or a bedside shelf.
Complete the Look and Frequently Asked Questions
A handmade frame feels even more thoughtful when it is styled as part of a gift set. That is where the details start to matter. A fabric-covered frame, especially one made with a soft floral or a crisp stripe, already has that boutique, handcrafted feel. Pair it with one or two pieces that support the mood, and the whole gift feels considered instead of padded out.
Shop the Look
- For a polished hostess gift. Slip the frame in with one of the canvas wine gift bags. It is a practical pairing, and the mix of texture feels especially nice if your frame is covered in linen or cotton rather than paper.
- For a dinner party table. Use small decoupaged frames as place cards, menu holders, or little signs for the buffet. If your frame uses fabric, repeat that same color story elsewhere on the table so it feels collected and intentional.
- For a thoughtful ready-to-give set. Add bath and home extras such as French-milled soap bundles to turn a handmade frame into a more complete gift set.
If you like to check the fine points before you begin, these common questions about our craft kits are also helpful for general supply and process expectations.
Common questions
What’s the best sealer for a decoupage picture frame
Acrylic sealers are a reliable choice for painted, papered, and fabric-covered frames. Polyurethane can give more hardness, but it can also add warmth or slight ambering, which is not always flattering on pale prints or delicate textiles. I usually reach for a clear acrylic topcoat when I want the finish to stay clean and true to color.
Can I decoupage a plastic or metal frame
Yes, if the prep is done properly. Wash off any residue, scuff the surface lightly, and use a primer that suits the material. Plastic and metal do not forgive shortcuts, so good prep makes the difference between a finish that lasts and one that peels at the corners.
Can I use fabric instead of paper
Yes, and it is one of the best ways to give the frame more texture and a longer-wearing finish. Lightweight cotton, lawn, and fine linen are easy to handle. Thick fabric can fight you around inside edges and carved details, so save heavier textiles for very flat frames. A tightly woven fabric also frays less, which makes cleaner corners.
Can I use my own printed photos
Yes, but choose the print carefully. Matte prints are usually easier to work with because they show fewer surface marks and tend to sit more naturally under a sealer. If the photo matters a lot, test your adhesive and topcoat on a spare print first so you do not risk smudging or dulling the image.
If you want a few finishing pieces to round out the gift, browse Jolitee for charming add-ons that complement handmade presents beautifully, from witty bottle bags to thoughtful extras for hosting and gifting.